Materials and Preparation

How to paint a bathroom sink – Embarking on the artistic endeavor of painting a bathroom sink requires an assemblage of essential materials. The primary component is paint specifically formulated for bathroom surfaces, which endures the humid environment and resists water damage. Brushes of varying sizes, both fine and broad, enable meticulous application and blending. Additionally, sandpaper in assorted grits and a primer tailored to the sink’s material are indispensable for surface preparation.
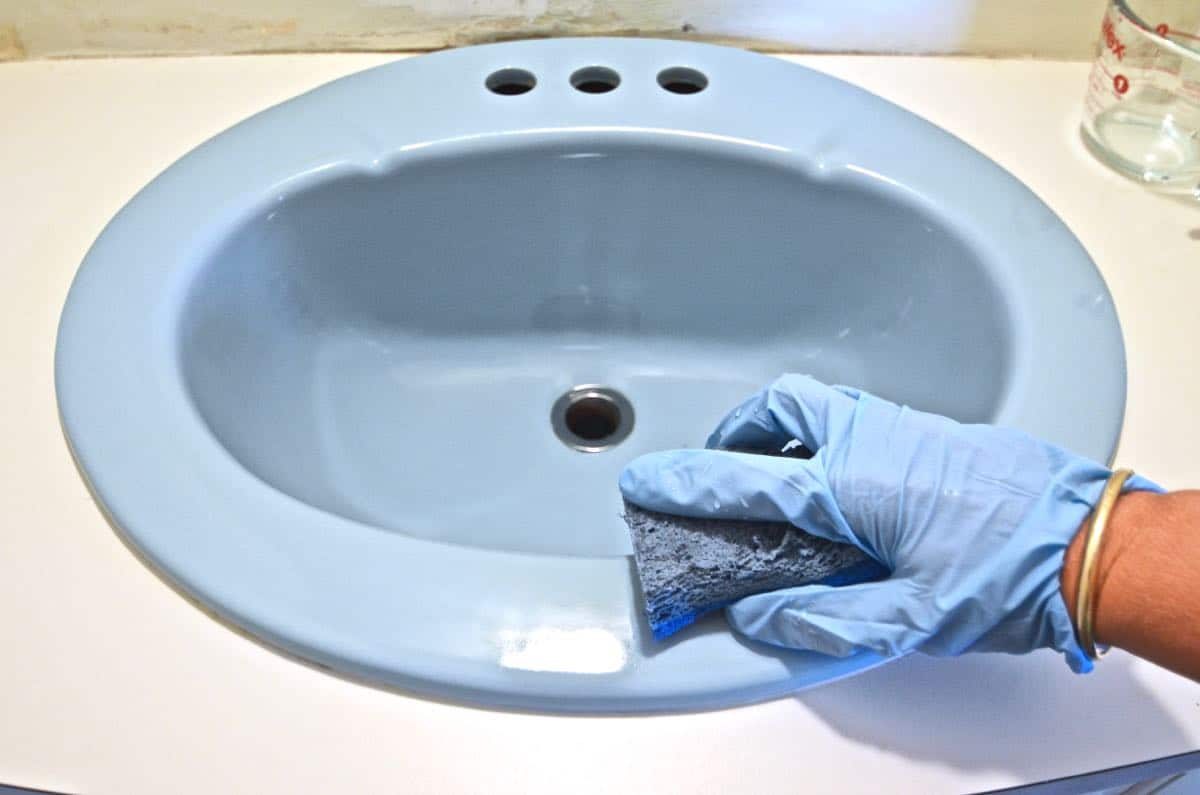
The porcelain sink in your bathroom can be easily repainted to match a new white bathroom vanity with sink or to simply give it a fresh look. First, clean the sink thoroughly with a degreaser and then sand it lightly with fine-grit sandpaper.
Apply a coat of primer and allow it to dry completely. Then, apply two coats of paint, allowing each coat to dry completely before applying the next. Finally, seal the paint with a clear polyurethane finish.
Surface Preparation, How to paint a bathroom sink
Before transforming the sink with a fresh coat of paint, meticulous preparation is paramount. Begin by thoroughly cleaning the surface with a degreaser to remove any lingering dirt or grime. Next, employ sandpaper to gently sand the surface, creating a slightly roughened texture that enhances paint adhesion. Wipe away any sanding residue and apply a coat of primer specifically designed for the sink’s material. This primer provides a stable base for the paint, ensuring a durable and long-lasting finish.
Painting Techniques
Achieving a smooth and even finish on a bathroom sink requires meticulous painting techniques. Understanding the nuances of different brush strokes and the importance of proper drying time is crucial for a professional-looking result.
The choice of brush stroke depends on the desired texture and finish. Rolling provides a smooth and consistent surface, while dabbing creates a textured effect. Stippling, a technique involving tapping the brush lightly on the surface, produces a subtle texture with minimal brush marks.
Multiple Thin Coats
Applying multiple thin coats is essential for an even and durable finish. Each coat should be allowed to dry completely before applying the next. This prevents runs, drips, and unevenness, ensuring a smooth and long-lasting paint job.
Design and Customization: How To Paint A Bathroom Sink

Customizing your painted bathroom sink is a great way to add your own personal style to the space. You can use decorative accents, patterns, or even freehand painting to create a one-of-a-kind look. Here are a few ideas to get you started:
Stencils
Stencils are a great way to add intricate designs to your painted sink. You can find stencils at most craft stores, or you can create your own using a stencil machine. To use a stencil, simply apply it to the sink and then paint over it with your desired color. Once the paint is dry, remove the stencil to reveal the design.
Masking Tape
Masking tape can be used to create stripes, checkers, or other geometric designs on your painted sink. To use masking tape, simply apply it to the sink in the desired pattern and then paint over it. Once the paint is dry, remove the masking tape to reveal the design.
Freehand Painting
If you’re feeling creative, you can also freehand paint designs on your painted sink. To do this, simply use a paintbrush and your desired colors to create your own unique designs. Freehand painting is a great way to add a personal touch to your sink.
Glaze or Sealant
Once you’re happy with the design of your painted sink, you can protect it with a glaze or sealant. Glaze is a clear coating that helps to protect the paint from chipping and peeling. Sealant is a type of adhesive that helps to keep the paint in place. Both glaze and sealant can be found at most hardware stores.
To spruce up your bathroom, painting the sink can be a great way to add a personal touch. Before you start, it’s essential to understand the different parts of the sink drain. Refer to a bathroom sink drain parts diagram to familiarize yourself with the components like the stopper, drain flange, and tailpiece.
Once you’re well-versed, you can proceed with painting the sink, ensuring a successful transformation.
